Thursday 8 October 2009

The place for lace

Review: Amazing Crochet Lace by Doris Chan

This isn’t a new book – in fact it’s about three years old, but it’s new to me. I got it as a birthday present just a couple of weeks ago.

The book starts with an introduction from Chan – why she crochets, her theory of ‘exploded’ lace and a bit of advice on how best to approach the patterns. Then it’s the usual abbreviations and stitch keys and then straight into the patterns. There are 19 of them in total, arranged into four chapters with names like Garden Party and Last Call, which seem to have more to do with the names of patterns rather than the look of any of the garments.

First things first, then, exploded lace means taking a pattern for some small decorative item – like a doily or table runner – and adapting it for bigger yarn, bigger hooks and a much, much bigger product, like a shawl, a t-shirt or a dress.

Chan also talks about every crocheter’s most hated stage – the foundation chain. She uses something she calls the BASE CH/SC. It involves making two chains and making both a chain and a single crochet into the first chain. Then doing the same into the chain of the stitch you just made, and repeating this till you’ve got the right number of stitches. It’s something I’ve never encountered before and the instructions and illustrations really are clear. With a bit of practice it was pretty simple. The resultant chain is an odd-looking bulky thing that is remarkably easy to crochet into. I’m not sure it’ll take over from a traditional chain in my crochet repertoire, but it’s certainly good to know.

The pattern I tested was Chrysanthemum Tea Shawl, a huge circular shawl adapted from three doily patterns. The instructions are easy to follow and the thick yarn and big hook mean the piece grows pleasingly fast. Each pattern comes complete with full written instructions and chart showing a sample of the lace pattern.

The garments, which include a skirt, a dress, t-shirts and shawls, are all lovely, with only a couple I wouldn’t wear. The layout and instructions are generally good, clear and simple to follow. But make no mistake, these pieces are not for the beginner. The patterns are complex, often involving hundreds of stitches. To do this you need the time and space to concentrate – don’t do what I did and sit down in front of Smallville and think it’ll turn out OK. It won’t. And make sure you check for errata before you start. I found a mistake in the special stitches box! But think how much worse it would be to have completed a few hundred stitches only to realise something’s wrong.

One problem is the photography. Each garment has a full-page plate and often another couple of photos. But these are all dark, making it difficult to see colours and detail. A little lightening in Photoshop would have helped. But this really is a minor niggle in an otherwise excellent collection.

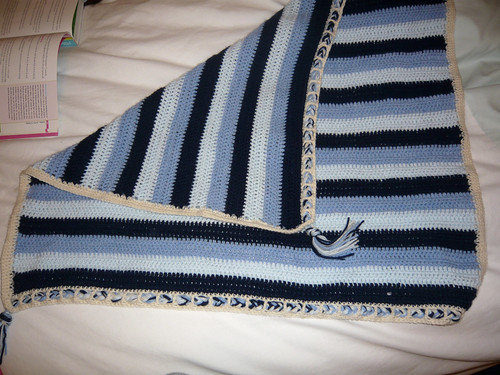
A couple of not-very-good shots of the shawl.


Thursday 24 September 2009

Baby blankie

When I finished this about a week ago I thought I really didn't have anything much to blog about. It's a baby blanket, for a friend's soon-to-be baby - what can be said about that? But then I remembered I didn't use the suggested yarn, so I had to Do Maths. And that's definitely something to write about.

It was simple enough to make - square and in long stripes, double (US) or treble (UK) crochet throughout. The yarn give was a worsted weight though, which we don't get in the UK. The closest we have is aran, but I couldn't find any in the colours I wanted. So I decided to go with DK. And that's where Doing Maths came in. I duly made up a tension square and worked out that I needed half again as many stitches for the length and rows for the width. Rather surprisingly I thought; I'd expected to have to double up on everything. A neat lesson there on why a tension square is so important!

It all went swimmingly well until I got the border - surely a double crochet wasn't going to be long enough to weave the braid through? After a couple of tests I settled on triple. Incidentally another break from the pattern was that I chose a different colour for the border rather than use one of the blues as per the pattern. Another problem came with the braid - the thinner yarn meant many more strands, but how many. Again with some experimentation, I worked it all out. I had to braid the yarn by holding it in my teeth!

I think it turned out OK - judge for yourself:

Wednesday 22 July 2009

In a twist

I might not rock at lace, but I'm undoubtedly the queen of cables. To take my mind of the shruggle I started on a cable tunic a while back. The back is finished and I've started on the front - I stopped at that point to go back to the shruggle, but as soon as I've finished the left front of that I'll swop back to the tunic.

The yarn for this is a cotton/acrylic mix. It's lovely to knit with and the stitch definition is great. It's worked really well for the cabling. The yarn given was a cotton, which I think would have turned out much heavier and probably not as cosy.

The yarn for the whole thing cost about £20 - £20 for a handmade cabled tunic! Which just goes to show that knitting doesn't have to be an expensive hobby.


Here's tunic! That's the completed back and the start of the front. I'm really hoping I get it finished in time for the cooler weather.


And here's the close up. Look at those cables! Look at that stitch definition! Cables rock.

The ongoing shruggle

Yes, that's right - I'm still at it. I started this in November last year and it's still going strong. Or should that be wrong?

Actually, though, I have improved no end. The back is complete and I've nearly finished the left front, and between now and November I did knit the back of a cabled tunic. So it's not too bad, I guess. I've definitely learnt a lot - such as don't knit with Kid Silk Haze, learn how to read charts before you start using them, lace is really, really hard. I also know what the stitches are supposed to look like so I know when I've gone wrong sooner. I understand where I've gone wrong too, which means my next lace project should be much easier. And yes, there will be a next lace project.

I might even do Cobweb again. But I don't think I'd do it in KSH. While it's light as air and pretty as the sea, it's a bugger to knit with and the stitch definition ain't great. But it's for my mum and she loves KSH, and that's the main thing. I think maybe a 4-ply mercerised cotton knitted up on larger needles would work quite well.


Here's the back and left front. The eagle-eyed among you might notice there's a small mistake in the lace. When I noticed it I decided it was far too late to rip it back. Besides, it's the mistakes that make it unique.


And here's a close up of the lace - the bit I got right. Check out that hot-pink duvet cover underneath! I'm very pleased I persevered with this.

Tuesday 31 March 2009

How to read a chart 101

Did you know you follow charts from right to left in knitting? I didn't. Think back to my lacy shrug, the one I knitted and unknitted several times before throwing down the needles and giving in. I was reading the chart wrong the whole time. No wonder it never looked right.

I'm a journalist by trade, which means I read and write a lot (obviously, really), so everything I do is left to right. It's how I think - I'm right-brained so gravitate left. But knitting doesn't work that way. It took a lot for me to work this out, and I'm still not entirely sure I'm there, but knitting goes right to left. It only seems like it goes the other way because I'm right-handed, but think about it: when knitting a right-side row you're actually going from the right-hand side of the piece to the left (ignore that tricksy fact that the knitting goes from your left-hand needle to the right one, and look at the actual fabric).

But it gets even more confusing because now swap to the wrong side: you're still going left needle to right, and it still appears that the fabric is building right to left. But that's because you're looking at the back! Hold the piece up and look at the front - the fabric is growing left to right.

And this is how we read charts. Obviously. All right-side rows (odd numbers in my experience, but I don't know if that's always the case) should be read from right to left. Wrong-side rows are read left to right. But these often don't have a pattern, in which case they don't matter.

In fact the chart should be a visual representation of what your knitting will look like. If \ is a left-leaning increase and O a yarn over, then your knitting should have a nice left increase and a nice hole wherever those symbols appear in the chart. Simple, see?

Well, it is when you know how.

But where does this leave me and my lacy shrug? Shamefully, it leaves my shrug at the bottom of my knitting bag and me doing very nicely thank you with a cabled tunic. I need to undo the rest of the lace rows of the shrug before I can apply my new knowledge, and quite frankly I can't face it at the moment. But the nights are getting lighter and the weather warmer and soon I'll be able to sit in the garden and knit. And that's when I'll break out the shrug. Honest.

The jumper on my back

It's done! All sewn up and I'm wearing right now. Unfortunately I can't post pictures because we moved recently and first I could't find the lead that connects the camera to the computer and then when I did the camera's battery died and I can't find the charger. It's around somewhere, though, and when it turns up there will be photos.

I'm pretty darn pleased with this jumper. It fits, it's warm, the colours are lovely and not usually something I would buy. I think it looks good. I made a couple of snafus - I somehow got the rib pattern in the wrong order for about four inches on one row only and some of the sewing up isn't so great. But all in all, it works. And I'm especially impressed that I've managed to make something this good as my first effort.

What would I do differently next time? Well, I think I'd make it in a smaller size; this one fits fine and I can get a tee-shirt on underneath, but something a bit more fitted would also be nice. I'd make the neckline a tad higher too. I think it'd be nice if the two colours were made more of. I think I'd like one that was one shade on all the ribbing and then another on the stocking stitch. Maybe a dark blue on the ribbing topped with a paler blue.